Mini Cooper N12 & N14 Engine Vacuum Pump Fitting Guide
Understanding the Vacuum Pump
The vacuum pump plays a crucial role in the function of the Mini Cooper N12 & N14 engines. It is responsible for generating the necessary vacuum for various systems such as:
Throttle Actuation: Helps in regulating the throttle response.
Emission Control: Aids in the function of the PCV system.
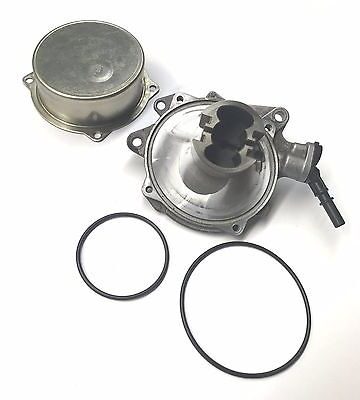
Components of the Vacuum Pump System
Understanding the key components involved in the vacuum pump fitting process can simplify both troubleshooting and replacement:
Vacuum Pump: The main unit that generates vacuum.
Gaskets: Crucial for creating a proper seal to prevent leaks.
Bolts and Fasteners: Used for securing the pump to the engine.
Hoses: Transfer vacuum from the pump to various systems.
Tools Required for Installation
Before beginning the installation of the vacuum pump, ensure you have the following tools ready:
Socket Set: For removing and tightening bolts.
Torque Wrench: Ensures proper tightening of fasteners.
Gasket Scraper: For cleaning the mounting surface.
Vacuum Gauge: To check the vacuum levels after installation.
Step-by-Step Installation Process
Follow these detailed steps to correctly fit the vacuum pump onto your Mini Cooper N12 or N14 engine:
Preparation:
Ensure the engine is cool.
Disconnect the battery to prevent electrical issues.
Remove Old Vacuum Pump:
Locate the vacuum pump based on the engine layout.
Remove the bolts using the socket set.
Carefully detach the old pump from the engine.
Clean the Mounting Surface:
Use a gasket scraper to remove old gasket material.
Ensure the surface is smooth and free from debris.
Install the New Vacuum Pump:
Place a new gasket onto the mounting surface.
Align the vacuum pump with the bolt holes.
Hand-tighten the bolts, then use the torque wrench to secure them.
Reconnect Hoses:
Attach any vacuum hoses to the appropriate ports.
Ensure all connections are tight and secure.
Reconnect the Battery:
Reconnect the negative terminal to avoid electrical issues.
Test the Installation:
Start the engine and let it idle.
Check for any vacuum leaks at the pump and hoses.
Use a vacuum gauge to ensure proper vacuum levels are achieved.
Troubleshooting Common Issues
If you encounter problems during or after installation, consider these common issues:
Vacuum Leaks: Look for hissing sounds or drops in engine performance.
Pump Malfunction: If the new pump isn't generating vacuum, check the electrical connections.
Noisy Operation: Excessive noise could indicate wear or improper installation.
Maintenance Tips
To ensure the longevity of your Mini Cooper's vacuum pump, adhere to the following maintenance tips:
Regular Inspections: Check the pump and hoses for wear and tear regularly.
Cleanliness: Keep the engine bay clean to prevent debris from entering the system.
Timely Replacements: Address any signs of a failing pump as soon as possible.
By following this comprehensive guide, you'll successfully fit and maintain the vacuum pump on your Mini Cooper N12 or N14 engine, ensuring optimal performance and reliability.